Using the Eagle Cut Manager
The Eagle Cut Manager as used as a queue for cuts, a device manager for plotters, and allows you to make slight adjustments to a plot before finally sending it out to the plotter.
If you’ve already read the Eagle Cut Quick Start Guide’s section on setting up plotters, skip section 1 and move on to section 2, which gives you more information on the other abilities of the Cut Manager.
1. Setting Up Your Plotter(s)
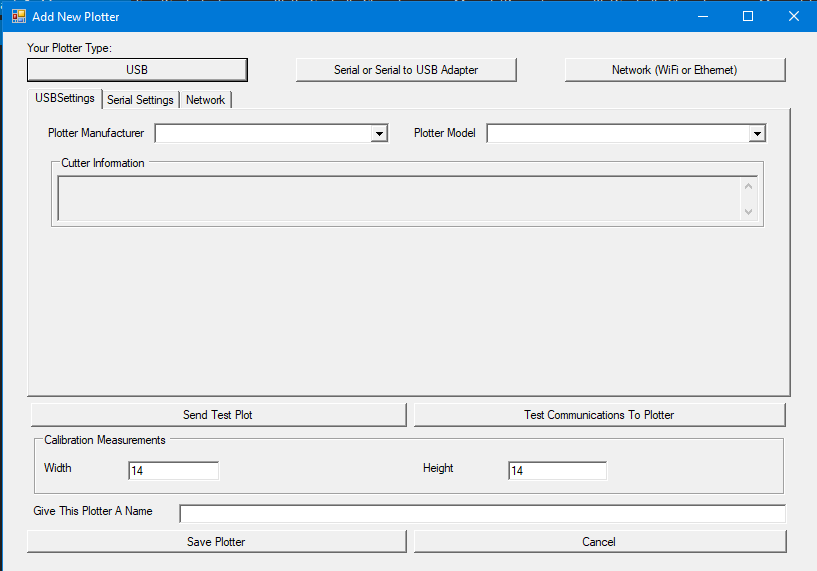
All setup for plotters are done in the Eagle Cut Manager. Hit alt-tab to switch to the Eagle Cut Manager. You should see this:

Click “Add Cutter” to bring up the interface for adding new devices.
For USB devices, make sure you device is plugged in before starting. If your plotter is brand new, or if it’s the first time using it on this machine, be sure to load the drivers from the cutter manufacturer. These are typically available from the manufacturer’s website, or for some devices auto-install when your plug in your plotter for the first time.
For USB Devices:
Select the USB Settings tab. Select your plotter manufacturer and model in the drop down boxes:

For different cutters there may be slight differences in the next steps. Eagle Cut Manager will walk you though them. For instance, when you select a Summa plotter, you’ll be presented with a “Port” selection (Port 1 – 4, as defined in your cutter).

Some plotters use drivers that appear in the Windows Printers dialog. For those, you’ll be presented with an extra drop down box. Here, you’ll select your plotter from the list of available devices:
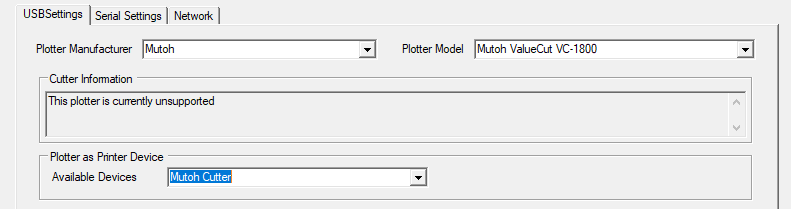
In the above image, you’ll notice the “Cutter Information” portion – this may give your more information about this cutter, such as settings, support information, or more. (Note: this is only an example. We support must Mutoh cutters.)
There is one more type of USB based cutter that may be a little confusing at first: some USB cutters use a USB to Serial interface internally, so when you plug them in, they are actually a new Serial port on your machine. In those cases, Eagle Cut Manager will automatically switch you to the Serial tab.
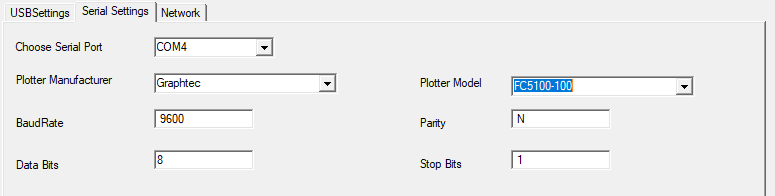
Serial Devices:
If your plotter is plugged into a Serial port, USB to Serial converter, or uses an internal USB connection, use the Serial Device tab.
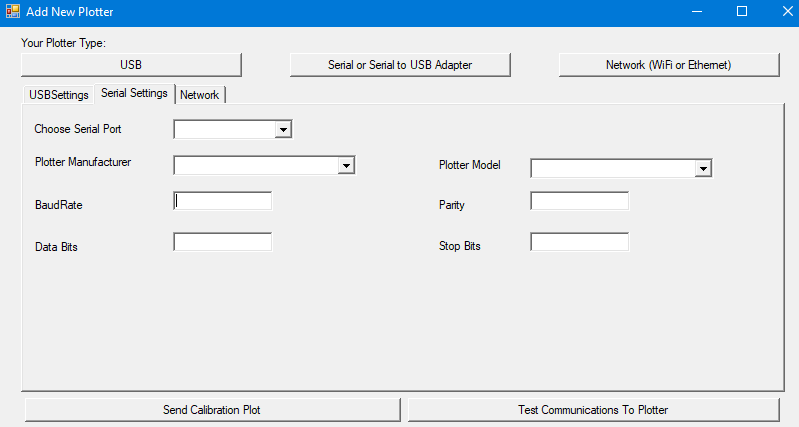
First, select the COM port the cutter is attached to:

Then select your plotter’s manufacturer and model. It will automatically fill out the known defaults for this device. (Note: these are the defaults. If your plotter doesn’t work for some reason, check these settings with the settings in the plotter.)
Ethernet / WiFi / Other Network Plotters
Eagle Cut does not support network attached devices at this time.
Calibration
After you’ve filled out the USB or Serial settings, it’s time to calibrate your plotter. Eagle Cut uses Eagle Enterprise’s Cut2Fit templates, and making sure your device produces an exact cut is key to a perfect fit.
Load product that is at least 14″ wide, and click “Send Calibration Plot”. The plotter should now plot a 14″ x 14″ square with an Length and With marker on it.
Measure this AS PRECISELY AS POSSIBLE. Enter the Width and Length measurement in the two fields provided.

Finishing up
Once you’ve entered the calibration settings, give your plotter a name, and press save. The add plotter interface will close, and you’ll see your plotter in the list of available plotters.

Section 2: Adjustments Before Cutting
When a template is sent to the Cut Manager from Eagle Cut, it’s assigned to a specific plotter. However, this can be changed. Select the template, then select which plotter you’d like to go to instead. This can be handy if a cutter is in use, or out of operation.

Once you have a template in the Cut Manager, you can’t add or remove elements, but you can make some adjustments.
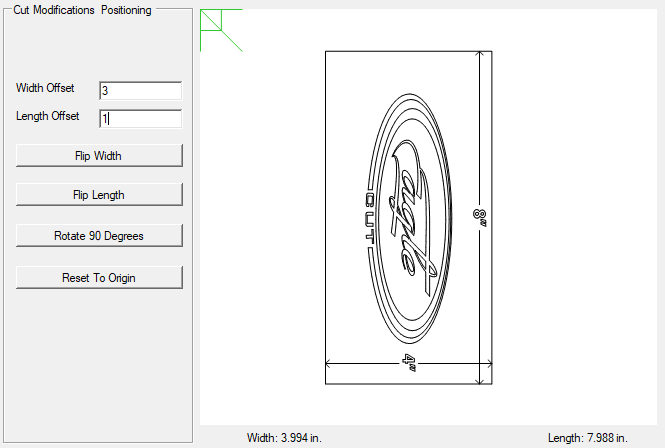
In the upper left hand corner is the origin reference – it shows you where the cuts will occur in reference to the page. When you change the offset (which is in Inches), it will move it across the material (width) or down the roll of material (length).
Flip width and length do what you would expect – they flip the image. Do be mindful that if there is text involved you may end up cutting the text backwards.
Rotation rotates the template.
3. Testing Plotter Function
If you think your plotter is having an issue, we provide a quick way to test it.

If you click on the cutter you want to test, then click “Create Test Plot”, you’ll create a new free template. Click it, and preform any offset, flip, or rotation operations you want to make, then click ‘Cut Now’. This will allow you to make sure all is well with your plotter. If you measure the 4″ and 8″ sections, and they are perfectly on the mark, then you also know your cutter is properly calibrated.
You may also delete the test cut using ‘Delete Cut From Queue’, rather than plotting it. You can also do that with a template you’ve paid for – but, it’s not suggested, as you’ll lose what you spent on that template.
4. Closing Eagle Cut Manager
Before you close Eagle Cut Manager, be sure you have no items left in the cut queue (not including test plots), or else they will be lost.